10 Best Ways to Declutter Your Kitchen Countertops
Share
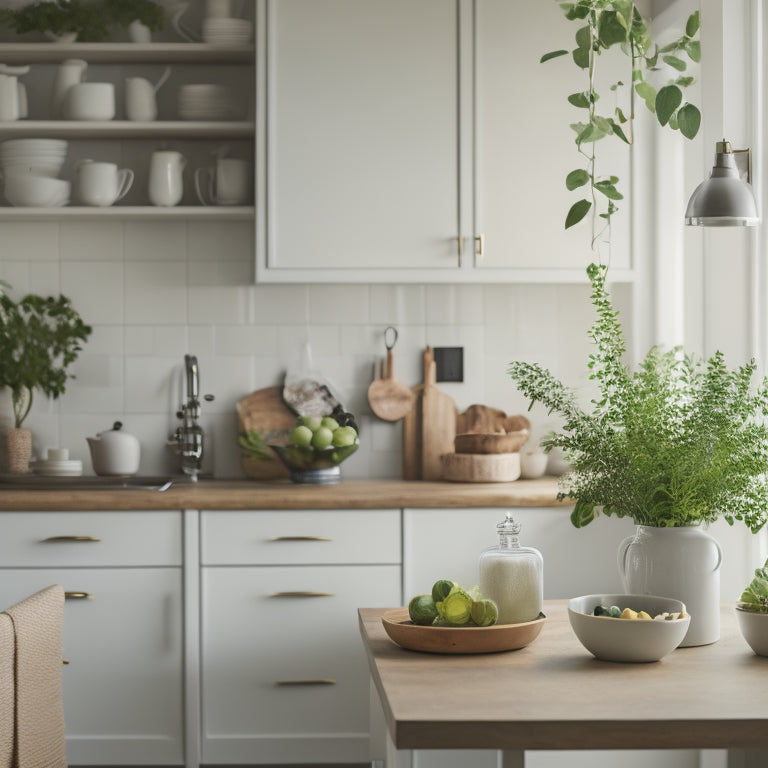
You're taking control of your kitchen countertops by eliminating clutter and creating a more efficient space that sparks joy and productivity. Start by purging unnecessary items, then designate zones for similar items and assign a home for each. Utilize vertical storage spaces, implement a "one in, one out" rule, and keep frequently used items accessible. Store heavy items below counters, incorporate a "landing strip" area, and schedule regular decluttering sessions. By following these strategies, you'll be well on your way to a clutter-free kitchen. Now, discover the specifics of each technique to maximize your kitchen's potential.
Key Takeaways
• Purge unnecessary items by sorting them into categories, identifying unused items, and donating or discarding them to free up countertop space.
• Designate zones for similar items, assigning a home for each item and creating kitchen hubs or task stations to maintain organization.
• Utilize vertical storage spaces by installing shelves, hooks, or pegboards to keep frequently used items accessible and maximize counter space.
• Implement a 'one in, one out' rule to prevent clutter buildup and develop healthy shopping habits by donating or discarding old items.
• Assign a home for each item, categorizing them based on use, and using labeling systems and containers to maintain a clutter-free countertop.
Purge Unnecessary Kitchen Items
Remove everything from your countertops and sort items into categories, such as baking supplies, cooking utensils, and appliances, to identify what you can realistically get rid of. This step is vital in breaking old kitchen habits that lead to clutter.
Be honest with yourself - when was the last time you used that fondue set or bread maker? If it's been over a year, it's likely taking up valuable space.
As you sort, consider the item sentiment attached to each object. Are you holding onto that vintage mixer because it was your grandmother's, or is it truly useful in your daily cooking routine?
Be ruthless - if it doesn't serve a purpose or bring you joy, consider donating or discarding it. You'll be surprised at how liberating it feels to let go of unnecessary items.
Designate Zones for Similar Items
Now that you've purged your countertops of unnecessary items, it's time to assign a home for each remaining item, grouping similar items together in designated zones that make sense for your cooking habits and workflow. This will help create a sense of order and make your kitchen feel more organized.
Think of these zones as 'Kitchen Hubs' or 'Task Stations' where you can quickly access the items you need for a specific task. For example, you might've a baking zone near the oven, a coffee zone near the coffee maker, or a prep zone near the sink.
Within each zone, group similar items together, such as all your baking utensils in one container or all your coffee-related items in another. This will make it easy to find what you need when you need it and prevent clutter from building up again.
Utilize Vertical Storage Spaces
Take advantage of the often-wasted space above your countertops by installing shelves, hooks, or a pegboard to maximize your kitchen's vertical storage capacity. This will help you declutter your countertops and keep frequently used items within easy reach.
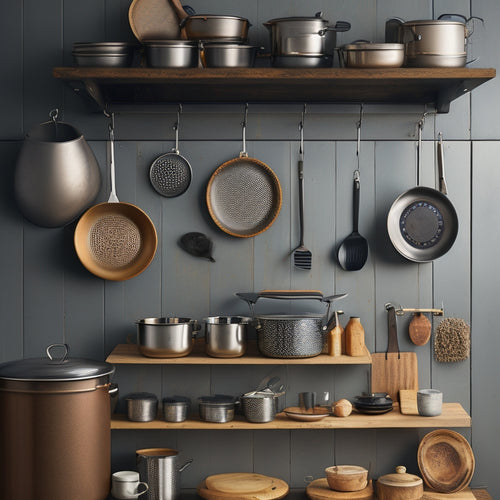
You can install wall shelves to store infrequently used kitchen gadgets, cookbooks, or decorative items. Ceiling hooks are perfect for hanging pots, pans, or utensils, freeing up cabinet space and adding a touch of industrial chic to your kitchen.
Consider installing a pegboard on a wall or the back of a cabinet door to hang frequently used items like spices, oils, or utensils. This will keep them organized and easily accessible. You can also use baskets or bins to store items like snacks, coffee pods, or cleaning supplies, keeping them out of sight but still within reach.
Assign a Home for Each Item
Designate a specific spot for every item in your kitchen, ensuring that each one has a designated home where it can be easily found and put back after use. This will help you maintain a clutter-free kitchen and save time searching for misplaced items.
Start by categorizing items into groups, such as baking supplies, cooking utensils, and breakfast essentials. Then, assign a specific spot for each group, taking into account the frequency of use and ease of access.
Use labeling systems to identify what's inside containers or on shelves, making it easy to find what you need at a glance. Container options like baskets, bins, and drawers can help keep items organized and hidden from view. Consider using a utensil organizer near the cooking station or a spice rack near the stove.
Implement a "One In, One Out" Rule
To maintain your newly organized kitchen, adopt a 'one in, one out' rule, ensuring that every new item you bring into your kitchen replaces an old one, thereby preventing clutter from building up again. This rule requires personal discipline, but it's worth it in the long run. By implementing this rule, you'll develop healthy shopping habits and avoid impulse buys that often lead to clutter.
Here's a breakdown of how the 'one in, one out' rule works:
| New Item | Replaces | Action |
|---|---|---|
| New kitchen gadget | Old, broken gadget | Donate or recycle old item |
| Cookbook | Outdated cookbook | Donate or recycle old cookbook |
| Kitchen appliance | Old, inefficient appliance | Sell or recycle old appliance |
| Kitchen decor | Outdated decor | Donate or recycle old decor |
| Pantry item | Expired pantry item | Discard expired item |
Opt for Multi-Functional Appliances
When you're shopping for new appliances, look for ones that can multitask. By choosing devices that serve more than one purpose, you'll reduce the number of gadgets cluttering your countertops.
For instance, a slow cooker with a built-in skillet or a stand mixer with a food grinder attachment can help you cook more efficiently while freeing up valuable space.
Space-Saving Designs Matter
Opting for multi-functional appliances, you'll find that they're a game-changer in maximizing your kitchen's real estate. By choosing appliances that serve multiple purposes, you'll free up valuable space on your countertops and reduce clutter.
For instance, a toaster oven with a built-in microwave can replace two separate appliances, saving you precious space.
When shopping for multi-functional appliances, consider compact layouts that fit snugly into countertop corners. Look for appliances with sleek designs that don't protrude too far from the wall, allowing you to make the most of your kitchen's corners.
A compact coffee maker with a built-in grinder, for example, can be tucked away in a corner, keeping your countertops clear.
Combine Tasks Efficiently
By streamlining your appliance collection with multi-functional devices, you'll be able to combine tasks efficiently and clear up valuable real estate on your countertops. This approach allows you to focus on batch cooking and time blocking, making meal prep a breeze.
Here are three ways to optimize your kitchen with multi-functional appliances:
-
Instant Pot or Pressure Cooker: These devices can replace multiple appliances, such as a slow cooker, rice cooker, and yogurt maker, freeing up space and reducing clutter.
-
Stand Mixer with Attachments: Invest in a stand mixer with attachments like a food grinder, pastry dough roller, or citrus juicer to simplify tasks and reduce the number of appliances on your countertops.
-
Multifunctional Blender: A high-powered blender that can handle hot soups, frozen treats, and everything in between will eliminate the need for separate appliances, keeping your countertops organized and clutter-free.
Streamline Cooking Workflow
Rethink your cooking workflow by incorporating multi-functional appliances that simplify tasks, allowing you to focus on meal prep rather than juggling multiple devices. By doing so, you'll achieve an efficient prep and maintain a smooth cooking rhythm. Think about replacing single-purpose appliances with versatile ones that can handle multiple tasks. For instance, a stand mixer can not only mix but also knead, whip, and beat ingredients.
Here are some examples of multi-functional appliances to contemplate:
| Appliance | Primary Function | Additional Functions |
|---|---|---|
| Stand Mixer | Mixing | Kneading, Whipping, Beating |
| Instant Pot | Pressure Cooking | Slow Cooking, Rice Cooking, Yogurt Making |
| Food Processor | Chopping | Slicing, Shredding, Grating |
| Blender | Blending | Mixing, Pureeing, Grinding |
| Air Fryer | Frying | Grilling, Roasting, Baking |
Keep Frequently Used Items Accessible
You'll save time and energy by reserving prime countertop real estate for the items you use daily, like your favorite coffee mug or go-to cooking utensils. By keeping frequently used items accessible, you'll create an easy grab and quick find environment that makes cooking and meal prep a breeze. This means you'll spend less time searching for that one utensil or ingredient, and more time enjoying the cooking process.
Here are three essential items to keep within easy reach:
-
Utensil holder: Store your most-used cooking utensils, like spatulas, whisks, and tongs, in a designated holder near your cooking station.
-
Spice rack: Keep your favorite spices and seasonings in a convenient spot, such as near the stove or oven, to save time when adding flavor to your dishes.
-
Coffee station: Designate a spot for your coffee maker, mugs, and coffee beans to create a quick and easy morning routine.
Store Heavy Items Below Counters
You'll be amazed at how much more spacious your kitchen countertops feel when you store heavy items below them.
To get started, categorize your heavy items into groups like appliances, cookware, and pantry staples, and then assign them to lower shelves or cabinets.
Heavy Item Categories
Sort your kitchen items into heavy categories, like appliances and cookware, and stash them below your counters to free up valuable space. This will help you create a more organized and clutter-free kitchen.
By categorizing your items, you'll be able to see what you have and where it should go, making meal prep and cooking a breeze.
Here are three heavy item categories worth exploring:
-
Bulky Gadgets:
Stand mixers, slow cookers, and other large appliances take up a lot of space on your countertops. Store them below your counters to keep them out of the way. -
Weighty Decorations:
Heavy vases, decorative plates, and other ornate items can be stored below your counters to prevent clutter and create a more streamlined look. -
Cookware and Dishes:
Stash your heavy pots, pans, and dish sets below your counters to free up space for more frequently used items.
Designate Lower Shelves
Designate lower shelves or cabinets specifically for your heavy item categories, ensuring easy access while keeping your countertops clutter-free. By doing so, you'll create a more organized and functional kitchen space.
For instance, you can store your stand mixer, slow cooker, or blender on these lower shelves, freeing up valuable counter space.
To maximize storage, consider using shelf dividers to separate and categorize your heavy items. This will prevent clutter from building up and make it easier to find what you need when you need it.
You can also use storage bins or baskets to store smaller items like cookbooks, spices, or oils. Label each bin or basket so you can quickly identify what's inside.
Incorporate a "Landing Strip" Area
Create a 'landing strip' area near the entrance of your kitchen where everyone can place their belongings, such as keys, wallets, and bags, to keep them organized and out of the way. This designated spot will help maintain a clutter-free kitchen by containing the chaos that often comes with daily routines.
By incorporating a 'landing strip' into your morning routine, you'll be able to quickly grab what you need and go, without having to search the entire kitchen for your essentials.
Here are a few ways to make the most of your 'landing strip':
-
Designate a specific spot: Choose a specific area, such as a tray or a small shelf, to serve as the 'landing strip'.
-
Use a tray or dish: Use a tray or dish to corral small items like keys, coins, and wallets.
-
Add a hook or two: Install hooks for hanging bags, backpacks, or jackets to keep them off the floor and out of the way.
Schedule Regular Decluttering Sessions
To maintain your newly decluttered kitchen countertops, you'll want to schedule regular decluttering sessions to keep the clutter at bay.
You'll find it's more manageable to break these sessions into smaller chunks, rather than trying to tackle the entire kitchen at once.
Set a Timer
Set a timer for 10-15 minutes daily to commit to a regular decluttering routine, helping you stay on track and maintain a clutter-free kitchen countertop. By dedicating a short amount of time each day, you'll be more likely to stick to it and make progress. This daily habit will boost your productivity and improve your time management skills, allowing you to tackle other tasks with confidence.
Here are three benefits of setting a timer for daily decluttering sessions:
-
Creates a sense of accountability: Knowing you have a set amount of time to declutter will motivate you to stay focused and avoid procrastination.
-
Breaks down the task into manageable chunks: Decluttering can feel overwhelming, but breaking it down into daily sessions makes it more achievable.
-
Develops a habit of maintenance: By making decluttering a daily habit, you'll be more likely to maintain your kitchen's organization and prevent clutter from building up again.
Declutter in Chunks
Declutter in Chunks
Break down your kitchen decluttering project into smaller, manageable chunks by scheduling regular sessions, helping you tackle one area at a time and make steady progress. This approach allows you to maintain focus and avoid feeling overwhelmed by the task at hand. Set specific dates and times for your decluttering sessions, and stick to them. This will help you establish a routine and make decluttering a habit.
During each session, dedicate yourself to a single area, such as the countertops or a specific cabinet. Use your timer to keep yourself on track and maintain a sense of urgency. Focus on removing any unnecessary items, wiping down surfaces, and organizing what's left.
Frequently Asked Questions
How Do I Determine What Items Are Truly Necessary in My Kitchen?
"Just like Marie Antoinette's lavish feasts, your kitchen should be a haven, not a cluttered chaos. Take a step back, reflect on your daily routine, and identify the kitchen essentials that truly spark joy, making meal prep a breeze."
Can I Still Display Decorative Items on My Decluttered Countertops?
You can still display decorative items on your decluttered countertops! Choose a few pieces that fit your decor style and create focal points, like a vase or a small decorative box, to add visual interest without cluttering the space.
What if I Have Limited Wall Space for Vertical Storage?
You're short on wall space? No problem! Focus on floor organization by using baskets or bins to store items, and utilize corner solutions like carousels or shelves to maximize your kitchen's hidden spaces.
How Often Should I Schedule Decluttering Sessions to Maintain My Kitchen?
You'll maintain your kitchen's calm by scheduling decluttering sessions daily, like wiping down countertops, and seasonally, like reorganizing cabinets, to create sustainable Daily Habits and a revitalizing Seasonal Renewal that brings you joy and a sense of belonging.
Are There Any Specific Decluttering Strategies for Small Kitchens?
You'll be surprised to know that 68% of homeowners feel overwhelmed by clutter! In small kitchens, you'll thrive with efficient layouts that maximize corner utilization, like installing a carousel or using a pedestal sink to free up floor space.
Related Posts
-

7 Essential Tips for Pot and Pan Storage
You're tired of digging through a cluttered kitchen for the right pot or pan, and frustrated with the scratches and d...
-

Boost Productivity With Free Google Sheets Templates
You can enhance your productivity exponentially by utilizing free Google Sheets templates, which offer a proven way t...
-

Streamlined Kitchen Sink Organization Solution
A streamlined kitchen sink organization solution must balance functionality with aesthetics. A well-designed system s...


