Heating Tool Troubleshooting Unveiled: Error Codes & Solutions
Heating tool errors can be quickly and efficiently identified and resolved by following a structured troubleshooting approach that addresses common issues, error codes, and component replacement procedures. Begin by following a systematic troubleshooting process, ensuring proper toolholder maintenance, meeting ventilation requirements, and keeping flammable materials at a safe distance. Understand and apply error code troubleshooting guides to identify specific problems, pinpoint root causes, and reference error code solutions. By following these steps, you can resolve heating tool errors efficiently and effectively, and enhance tool performance and productivity. Discover more about troubleshooting heating tool errors and preventing common issues.
Key Takeaways
• Follow a systematic troubleshooting procedure to identify and resolve heating tool errors efficiently.
• Understand and apply the error code troubleshooting guide to pinpoint specific problems and their solutions.
• Replace components correctly by following the correct steps to avoid further issues and ensure peak tool performance.
• Regularly clean the toolholder to prevent sticking and ensure proper tool function, reducing the likelihood of errors.
• Reference error code solutions and take corrective action to resolve issues quickly and minimize downtime.
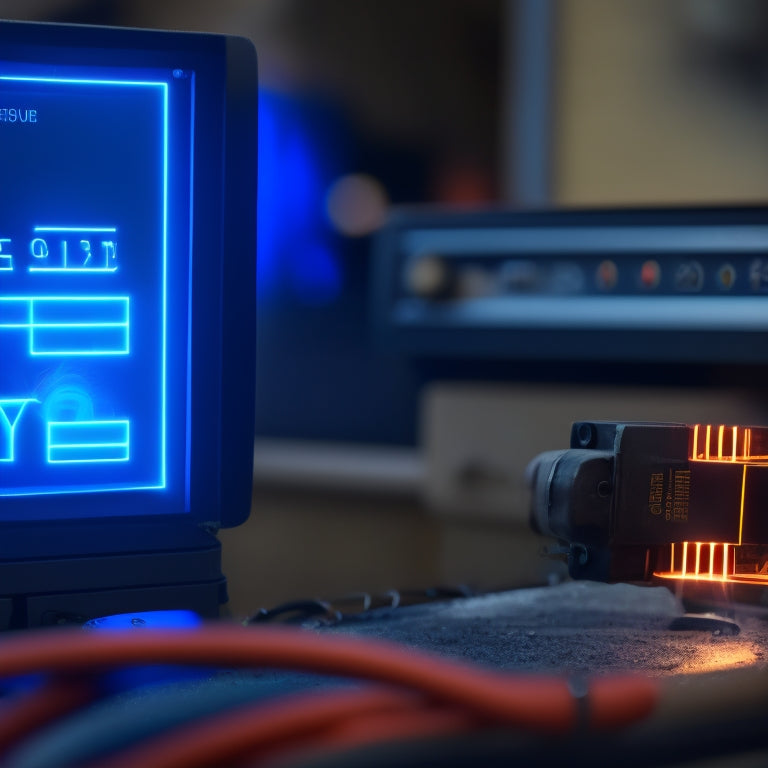
Troubleshooting Procedures Overview
When encountering issues with heating tools, it is important to follow a systematic troubleshooting procedure to identify and resolve the problem efficiently. This approach ensures that the root cause is addressed, rather than just treating the symptoms.
Proper toolholder maintenance is essential, as sticking can occur if they are not cleaned thoroughly. Additionally, ventilation requirements must be met to prevent overheating and guarantee safe operation.
The induction shrink fit machine generates heat, so it's important to keep flammable materials at a safe distance. By following these guidelines, you'll be well on your way to troubleshooting like a pro and getting your heating tools up and running in no time.
Error Code Troubleshooting Guide
To efficiently diagnose and resolve issues with heating tools, it is necessary to understand and apply the error code troubleshooting guide. This guide provides a systematic approach to identifying and addressing specific problems. It helps heating tool maintenance by pinpointing the root cause of errors, allowing for swift resolution.
Error codes E1 to E5 correspond to distinct issues, such as machine heating errors, overheating, power supply errors, and more. By referencing the error code solutions, users can take corrective action, ensuring minimal downtime and peak tool performance.
Component Replacement Steps
Replacing faulty components is an essential aspect of heating tool maintenance, demanding a thorough understanding of the procedures to guarantee seamless integration and peak performance.
When replacing components, it's important to follow the correct steps to avoid any further issues. For instance, when replacing the CT2 Current Sensor 2, make sure correct cable connections and secure the sensor properly.
Similarly, during Heating Head Replacement, troubleshoot the Heating Head Overheat Sensor and reconnect all cables correctly. Remember to clean the toolholder regularly as part of your maintenance tips to prevent sticking.
Additionally, always refer to the troubleshooting guide for specific error codes and solutions. By following these component replacement steps, you'll be back to peak performance in no time, and your heating tool will be humming like new.
Haas Business and Policies
Haas CNC Products are supported by a thorough set of business policies, including a Haas Delivered Price that encompasses all shipping expenses, export and import duties, and insurance, providing a transparent and hassle-free purchasing experience.
This all-inclusive pricing eliminates surprise costs, giving customers confidence in their investment. Additionally, Haas offers extensive warranty coverage, offering peace of mind and protecting customers' investments. The warranty specifics may vary depending on the product, but customers can inquire about the details.
Haas shipping policies are designed to guarantee timely and secure delivery of their products. By having a clear understanding of these policies, customers can focus on what matters most – getting the most out of their Haas CNC Products.
Community Support and Resources
Through its dedicated community and various initiatives, Haas provides customers with a thorough support network, offering valuable resources, networking opportunities, and expertise to enhance their overall experience with Haas CNC Products.
The Haas Community, a platform for user engagement, allows customers to share experiences, best practices, and provide feedback, fostering a sense of belonging and resource sharing.
The Haas Certification Program, another initiative, empowers users to develop their skills and knowledge on Haas products, culminating in a certificate of proficiency.
Troubleshooting Heating Tool Errors
When troubleshooting heating tool errors, it is crucial to follow a systematic approach to identify the root cause. Start by checking the toolholder maintenance, ensuring it's clean and free from sticking.
Next, verify ventilation requirements, as improper airflow can lead to overheating issues. Refer to the Symptom Table for specific error codes (E1-E5) and corresponding solutions.
For instance, Error Code E1 may indicate a machine heating error, which can be resolved by checking the heating head connection.
Preventing Common Heating Issues
Proper maintenance and adherence to safety guidelines are key to preventing common heating issues in induction shrink fit machines. Regular cleaning of toolholders and cutting tools prevents sticking, while ensuring proper ventilation and keeping flammable materials at bay minimizes the risk of accidents.
Additionally, preventive measures such as checking incoming power wiring and toolholder installation can prevent error codes like E3 and E4. By following these maintenance tips and preventive measures, you can avoid costly downtime and extend the lifespan of your machine.
Frequently Asked Questions
What Is the Ideal Temperature Range for the Induction Shrink Fit Machine?
Essential temperature control is vital for the induction shrink fit machine, ensuring heat consistency between 150°C to 250°C for efficient shrink fitting, while maintaining a safe operating environment and preventing overheating issues.
Can I Perform Machine Servicing Without a Local Hfo's Assistance?
The DIY enthusiast in you wants to defy the manual, but resist the temptation! Machine servicing sans local HFO's expertise is a recipe for disaster. Invest in operator training and strict maintenance schedules to guarantee smooth operations and avoid costly mistakes.
How Often Should I Clean the Toolholders and Cutting Tools?
To prevent tool wear and guarantee peak performance, establish a regular maintenance schedule to clean toolholders and cutting tools thoroughly, ideally after each use, to avoid sticking and prolong tool lifespan.
Are There Any Safety Precautions for Handling Flammable Materials?
When handling flammable materials, prioritize fire hazards mitigation by maintaining a safe distance from the induction shrink fit machine and ensuring proper ventilation to prevent ignition, thereby minimizing material damage and personnel risk.
Can I Modify the Haas CNC Product's Design to Suit My Specific Needs?
Did you know 80% of manufacturers prioritize customization to stay competitive? When it comes to modifying Haas CNC products, explore Customization Options and Design Flexibility with Haas experts to guarantee seamless integration and peak performance, while maintaining warranty validity.
Related Posts
-

Deighton Associates Awarded for Excellence in Asset Management
You're likely curious about Deighton Associates' recent recognition for excellence in asset management. They've recei...
